Showing posts with label YouTube. Show all posts

Tuesday, June 14, 2016

Influenster-Maybelline Vivid Matte Liquid Lip Color (Review/Swatches)


I received the Influenster box for the Maybelline Vivid Matte Liquid Lip Colors. They sent me two shades complementary to test out and tell you my opinions about them. So, of course being the makeup junkie that I have created I jumped at the chance to try a new product.

The shades that they sent are #10 Nude flush and #35 Rebel Red. I thought it was a good thing that they did send a variation in shades to get a good idea on how I feel about them. The size/tube of the liquid lip color is 0.26 Fl Oz. it comes in a square tube, not very bulky at all, which is great for easy storage...just in case you so feel inclined to go and buy the full Vivid Matte collection which has 10 shades available. The shades vary from nude, red, to purple.

So, let's do a little reviewing, Shall we? Of course we shall!

The formula- I found that the word matte is used very loosely when these lip colors were named; Since, when you apply the moussy-like liquid pigment you don't end up with a matte finish. Influenster suggested on the enclosed info card that they can be blotted with a tissue to achieve the desired matte finish. But even if you take the extra step to "mattify" this lipstick it doesn't end up 100% matte, it does however take away some of the shine. I do believe that the lip colors are indeed very vivid and pigmented. But if you so wish to blot, you will actually end up taking away some of the pigment and opacity along with the excess shine. So, I don't think that this is a bad formula at all. It is very smooth and super comfortable to wear. However, when it comes to the long wear of a matte liquid lipstick-that it does not have.

Personally, I think that they look prettier without blotting and just showing it's true potential colors. I don't mind that they aren't matte. Because along with the word matte comes craking, extra dry, and unflattering chapped lips. If the word matte were taken away from the name and simply advertised as a vivid liquid lipstick this would be absolutely true. Now, because the formula is so soft and creamy I didn't feel that it would set on my lips. This entails that the lip color will come off easier when eating or drinking..and if you don't mind having to re-apply you'll definitely love this product because it shows up great on the lips.


Now, one thing that I forgot to mention in my unboxing-review video was that they do have a slight perfume scent that may or may not bother you. I felt that the scent did stay on the lips after application but it wasn't bothersome.

To conclude..would I recommend this product?

If you want a liquid lipstick that is very pigmented, opaque, and creamy then I will recommend it to you. Even as the matte liquid lipstick seems to become uber popular not everyone is a fan of dry lips, so this would be a way to wear a liquid lip if you don't mind giving up the longevity.

Check out my video on YouTube for a full review and live swatches of the two shades and if you enjoy the review let me know ;)
>>>>>>>>>>>>https://youtu.be/_N0aH6-GtfY<<<<<<<<<<CLICK HERE TO WATCH!!!!


Wednesday, December 3, 2014

Dealing with Anxiety,Depression,Panic Attacks

Hello friends...


I have seriously debated about making this post public because in my personal life I'm extremely introverted and resolve to dealing with any problems privately. Apart from family and a couple close friends I usually don't discuss my problems with others. Because I feel that sometimes people only ask things so that they will know some of your weaknesses and be able to hold them over your head. I know that this sounds really insecure, and I guess that even at my age..I am that insecure girl.


Well, I'll start by telling you that I have had anxiety since I was about 18; I will be 33 this June, so for about 15 years anxiety has been the constant,unwanted companion by my side. It's sad to say but it has controlled my life and lifestyle so much that there are so many things that I have avoided doing or simply made 101 excuses as to why I could not do them. I'm naturally an introvert and I do enjoy being alone for the most part, however I also have to say that I many times avoid social settings because I feel awkward and out of place. I think that I could probably even trace feeling out of place back in high school, I didn't feel smart enough, pretty enough, or even bad enough to really fit into any group. It is true that life's problems and stresses usually make anxiety worse. Although, I have had good times in between the not so good, last May 2013 was definitely the worst of all.

I would define it as having a nervous breakdown, as awful as it sounds to admit it to you who is reading this. Because to a certain level it does make me feel ashamed to feel and to know that my insecurities, issues have broken me so much. I can tell you that it was the worst thing ever, it made me doubt myself so much. I felt like my constant panic attacks were getting worse each time, until I ended up going to the emergency room thinking I might be having a heart attack. If you have not ever experienced anxiety to such a severe level, I should explain that usually what happens is that your mind, negative thoughts take over;essentially it's you fighting against yourself once those thoughts turn into real physical symptoms.

Because my anxiety turned into something that I could not control at all for the first time I resorted to taking medication. This is something that I had always avoided because I din't want to be dependent on a drug. At this point I couldn't walk outside without feeling an extreme fear and feeling dizzy every time.

Sometimes people think, well how can you be so weak minded and not be able to control this? I would have to answer by saying that I don't consider myself weak minded. I have tried to learn, teach myself methods/techniques in order to make myself better. However, once you do everything possible and like I mentioned, it might help at times, but then you know you will never completely rid yourself of it. I have cried,prayed, talked it out, tried to escape, hide out so many times and then it's there. I really wish I could be that carefree person that does as they please without worry to repercussions, but I have never been that person. I am the person that over thinks every situation/conversation, and then over analyzes all the factors. If it were as easy as just not being a worrier, I suppose it would be more simple but this is not the stress free world that we live in.

I accept that I am a completely flawed person, not for my issues and insecurities-rather because my fears have taken over of my potential happiness. To me this is the one most-important thing in life "happiness"; it seems that we should all be entitled to sheer joy of life but sometimes working at being happy gets so hard. I doubt myself so much because I constantly remember past mistakes, memories, what I could-should have done, and what I fear I may never be able to do. I'm fully conscious that my past is gone, the future feels further from my wishes because living the present can get quite difficult. I should clear up that I'm not that dark-depressed person, I love to laugh all the time. But when it gets down to being alone then we have to listen to ourselves and face our problems and simply live the life we have been dealt with. I know that this may be sounding like the lamest post you ever read about, but I'm a real person and I have real problems.


Wednesday, May 28, 2014

LET'S TALK BRONZERS

Hello! Today I thought it was a great idea to talk about bronzers because Summer is only a few weeks away!! So, here I'd like to show you some bronzers: I'll  briefly describe 10 different bronzer brands and show you swatches in the video. Here (on the blog post) I'll show you close up pictures of all the products and price details that are available. Hope this can aid you in finding a new bronzer that will make you look great this summer! If you have other favorites that you would like to share or questions feel free to ask here or on the video page.


NYC SUNNY BRONZER 720A

$2.99


ALMAY POWDER BLUSH 110 NATURAL

$2.92-$8.82


VICTORIA'S SECRET BEAUTY RUSH
BEACH BUNNY
TANTASTIC

*NO LONGER ON V.S. WEBSITE-ONLY EBAY
$4.99-$10.99


MILANI BAKED VRONZER 05 SOLEIL

$7.79-$8.99


LORAC BRONZED BRONZER (from the Bejeweled Day/Night Jewelry Box)

*NO LONGER ON LORAC WEBSITE-ONLY EBAY
LIMITED EDITION/SOLD SEPARATELY

$18.74-$24.99


RIMMEL LONDON SUNSHIMMER 002 SUN LOVE

$8.49


REVLON PHOTOREADY 100 BRONZED&CHIC

$7.99-$10.97


TARTE CLAY MINERAL BRONZER HOTEL HEIRESS

$30.00


E.L.F CONTOURING BLUSH & BRONZING POWDER ST. LUCIA

$3.00


THEBALM BAHAMA MAMA BRONZER

$13.99-$20.00


Saturday, April 12, 2014

Spring Pop of Color (eyes) !


Hello! I just wanted to show you the look that I have been doing the most recently, now that Spring is here. It has a pop of color in the eyes, yet subtle and still quite neutral. If you feel that it doesn't suit your look or what you might wear on an everyday basis, just omit the colored liner;even though that's really the fun part of it! :) It's too easy not to try-go for it!!


Spring Pop of Color!!

Click below to watch! :)


PRODUCT LIST:
Maybelline Expert Wear Eyeshadow Linen 15S
revlon Photoready Bronzer Bronzed & Chic
Milani Baked Powder Blush Rose D'Oro 02
Milani Baked Bronzer Soleil 05
NYX Single Eyeshadow Chocolate Brown
Jordana MetalRocks Eyeliner Paradise Blue
Victoria's Secret Sexy Spring Eyes Palette
Avon Glow Eyeliner Desert Gold
Urban Decay 24/7 Glide on Shadow pencil Rehab
L'oreal Voluminous Mascara
Nyx Lipliner Nude Beige
Wet N' Wild Matte Lipstick 902C
Rimmel by Kate Lipstick 14 

Monday, April 7, 2014

Peanut Butter Cookie Recipe

Hello! So, you may have now noticed that I've been into baking recently! I admit that I'm not the greatest baker (even though I do love to cook) but I love to learn new things and of  course enjoy the finished products ;) Give it a try, I must say that I really enjoyed how these cookies turned out (happy me!!)...


Ingredients:

1/2-Cup Butter
1/2-Cup Sugar
1/2-Cup Brown Sugar
1/2-Cup Peanut Butter
1/2-Tsp. salt
1/2-Tsp.Baking Powder
1/2-Tsp. Baking Soda
----------------------
1-Egg
----------------------
1 1/4-Cup Flour

Cover 2-3 hours
Bake at 375 degrees 10-12 min
I made 24 cookies (about 1 tbsp sized)


In your mixer put in butter,sugar,peanut butter, salt, baking powder, and baking soda (mix until combined).
Then, drop in your egg-mix everything again. Lastly, drop in the flour and mix until you have your batter;which needs to be refrigerated for at least a few hours so that it's easier to handle (it will slightly harden a bit).

After taking your batter out of the fridge-choose a spoon, measuring spoon, ice cream scoop (whatever works) to get uniform sized cookies. Once you measure them, take the amount of batter separated and turn it into a ball with your hands. Line your baking pan/dish. Evenly line up the balls of batter so that they will have enough space to spread out as they bake.

I was able to fit nine cookies at a time so that they would have enough space to expand. Then, just taking a fork, you can press down on the ball of batter-then press down in the opposite direction and create the hash tag on the cookie (I found that even if I pressed hard my hash tags didn't show up too much at the end,but really didn't bother me because it doesn't affect flavor!!). Place in your oven 10-12 min at 375. I liked mine best left over a little over 10 min because I got that extra toasty,crispy cookie.

This was my final result!! They are really good; not too sweet, they have that peanut butter taste of course but it's not overwhelming :) Give it a try and let me know how they come out! Also, do subscribe to my blog and YouTube Channel. On the blog you find more random posts, and on the YT channel I try to stick to beauty related videos!
See ya!! :)


Thursday, March 20, 2014

Oatmeal & Raisin Cookie Recipe

Welcome Spring!! :)

Today I decided to try baking oatmeal and raisin cookies. Baking is not my forte, but I was feeling it today.
So these are pretty easy -at least I thought. This is the first time I make them; they are imperfect but perfectly delicious-golden around the edges and soft/chewy in the center. Give it a try, enjoy, and of course share any tips below!


Ingredients:
1- Cup Room Temp Butter
1-Cup Brown sugar
1/3-Cup white Sugar
2-Eggs
1-Tsp. Vanilla Extract
1 1/2- Cups Flour
1-Tsp. Baking Soda
1-Tsp. Salt
1/2-Tsp. Ground Cinnamon
3-Cups Rolled Oats
1- Cup Raisins


Mix butter until creamy, then add brown & white sugar. When completely mixed incorporate eggs and vanilla (one at a time). In a separate bowl combine dry ingredients and mix well (flour,baking soda,cinnamon,salt). Pour the dry ingredients into buttered sugar and combine them together. Make it all smooth before you pour in your oats and raisins. Grease you pan lightly, drop uniform shapes/circles separated evenly and bake 15-25 min at 350 degrees (depending on your oven). Check for crisp edges and soft centers. Allow a few minutes to cool, then place on cooling rack.


Of course, feel free to use other healthier options into the recipe or substitute any ingredients.
Enjoy! A great way to welcome the beautiful Spring.... cookies are a great way to welcome 
anything!!haha! ;)


Wednesday, March 12, 2014

Lasagna (without pasta) Using Mexican Squash/Calabacitas

Hello friends! Yesterday I decided to try out a new recipe, you know you may see something similar then put your twist on it. I didn't know if or how it would work, but I have to say for the first time making lasagna without the pasta it was good! You know there is nothing diet related about lasagna because it's cheese,pasta,meat, and more cheese on top. Well, I thought I might try doing a variation using Mexican Squash or calabacitas. I prepped my meat, sauce and condiments and instead of using pasta I used slices of the squash (length-wise). Of course no lasagna can be called a lasagna without delicious bubbly cheese, yumm!! So, this is not necessarily "healthy", but hey lets do it one step at  time! For now I only substituted the pasta and the rest of the ingredients were added as per usual in the creation of a delicious lasagna.

Ingredients:
1 lb. lean ground beef
1/4 onion roughly chopped
2 garlic cloves
1 tbsp oil (to add to your pan to cook meat)
garlic salt to taste
oregano
basil (4-6 leaves or as wanted)
4 med tomatoes chopped not too small
6 Mexican Squash-calabacitas (sliced length wise)
1 can tomato sauce
chili flakes (if desired)
1 lb mozzarella
1/4 lb cotija cheese

Start out by mincing your garlic, and cutting the onion so that they can be sauteed in a lightly oiled pan. After they have released their aroma and you gave them a couple minutes, proceed to add the ground beef meat and incorporate the onion and garlic into the meat.Keep your stove on medium to low heat to give the meat enough time to cook without burning. Add garlic salt over the meat,oregano, chili flakes as needed (I don't measure these things,you just have to eye it,taste,if you're not happy add more). As the meat has fully cooked pour over your chopped tomatoes and basil (about 4-6 leaves or more). Wait for the tomatoes to incorporate, release some of their flavor and add your canned tomato sauce.

In an oven-safe container add sauce to the bottom of your dish and begin assembly. Since the squash will be cut length wise you can comfortably form rows then begin to add your meat and sauce over the squash. Continue with a layer of the cheese mixture (mozzarella&cotija grated), and again add a layer of squash. Continue adding the layers until you are both finished with the meat/sauce and squash. Remember to leave enough cheese to be used as a delicious topping for your lasagna.


Put in the oven at 350¨ for 30-45 min depending on your oven. You can cover with foil for most of the cooking and uncover the last 10 min to get a golden-cheesy layer! Bon appetite!! Enjoy it, food is meant to be enjoyed-we may not eat this very often because it's so rich but when we do, we must enjoy!!


Wednesday, March 5, 2014

Fish Soup (Caldo de pescado) Recipe

Hello friends! Today I made fish soup/broth for lunch and being that cooking is also one of the things that I find so much enjoyment and passion over I wanted to share. I might periodically try to post up some other recipes as time goes on. If you try it, you might be pleasantly surprised and like it or you can tweak it to what ever you like best! See ya!! ;)


Catfish whole (ask your butcher to cut for you)
6 carrots
4 large potatoes
2 celery stalks
4 tomatoes
1 onion
3 garlic cloves
1 chile pasilla
cilantro bunch
lemon (optional)
salt
Knorr chicken bouillon
oil (I used vegetable oil)
pan
stew pot

In pot start to boil water about halfway full with onion and garlic clove and salt.
Cut up your potatoes, carrots, and celery and drop into the pot that you have started with the boiling water.
In a pan heat up some oil, open up your chile pasilla,clean it, and fry/toast in the oil (without burning it). Cut up your onion, tomato, garlic (roughly cut) and cook in the extra oiled pan until tender. In your blender take the chile pasilla with a little bit of the water from the vegetables and blend until smooth. Use a sifter to add your chile pasilla to the broth/soup.Once the tomato and onion mixture has softened in your pot blend it all smooth and pour in your pot as well. To the pot add roughly cut cilantro and chicken bouillon-taste for salt preference. At this point all your vegetables should be soft, and your catfish entirely cleaned out so that it can be added to the soup. Cook the fish until tender and once the soup has attained the desired consistency. Best served hot,optional with a drizzle or lemon.

*keep your flame/fire at a med level because you don't want all your vegetable to break down.
*When you add the fish bring flame/fire to lowest temp for a slow simmer so that your fish does not fall apart.

Enjoy!! Hope you like it...It's not too fishy-not too spicy,just right!! Leave me comments below :) !!!


Friday, February 21, 2014

1 Year Anniversary!!- B3beautybyblanca/ YouTube

Hello Friends!
I'm super excited to share that it has now been one year since I started my channel B3beautybyblanca on YouTube! It's pretty awesome because it was something that I wanted to do, but wasn't sure I'd be good at-because I'm not a pro. I just happened to become pretty much addicted to beauty videos on YouTube; with plenty of time on my hands thought it might be something that I could try to do.

When I started my channel I wasn't expecting to become any YouTube star, which I haven't become- and that's o.k. I asked my friends on Facebook to come over and watch me, which probably sounded pretty annoying. But I'm really grateful to those that did and continue to take the time to watch a video or read my blog. It's really meaningful to get that support and it makes a big difference.

I should explain that I didn't start my channel because I'm egocentric or even think that I'm so beautiful that I can't get over myself....that's far from it! I have always felt normal,regular, I guess?! I do however believe that doing what you like and really enjoy makes you feel good and gives you a particular satisfaction. So, even though I'm not a professional make up artist, I don't have the funds to try the millions of beauty products that I would love to try and be able to tell you how awesome they are-I really enjoy doing this!!

I started the channel in the hopes of having something positive, to keep my mind entertained and distracted from problems/life. Not that I would be escaping reality, but rather bringing some beauty to it-did you catch that ;) ? This seemed like a new adventure when everything seemed to be going wrong. I needed pretty much desperately to feel that I could create, be productive, and learn. I don't know if my make-up techniques are all that great, but I think I've developed them a bit (or I'd like to think so! you can be the judge of that! haha!). When I started doing the videos I had no idea how to edit them,NO CLUE! I won't say that I'm a miracle worker now, but I'm content with the fact that I have learned so much about how to make a video/tutorial. And it's not as easy as it seems when you see it.

When we look at a video/tutorial within the first few seconds have enough time to decipher whether it should be allowed our view or not. Meanwhile, on the other side of the screen preparing, creating, revising the project takes so much time even for a video that will only be a few minutes long.

Well, even at my inexperienced level it has taken a lot of time which I have enjoyed for the most part. I guess the joy doesn't come in knowing that thousands of people will watch the video, rather in the fact that you put the work into it and completed it! I would have loved to have done more with my channel in the past year but because of health reasons I did not feel balanced enough to continuously produce more work (because it is work even if the only thing you earn from it is self satisfaction).

O.k. so this has been stretched a bit long...I have to say THANK YOU again for being supportive!!

-P.S. official date 2/17/13-first video published on YouTube
(I had other issues to attend to this week and had not been able to post this! ahhh!)
-Oh! I saw a beautiful humming bird today in my back yard near the basil plant I like to believe they're good luck and anytime I see one I will make a wish! Hope it works!


Thursday, February 6, 2014

DIY: Chocolate Covered Bonbons


Hello Friends!

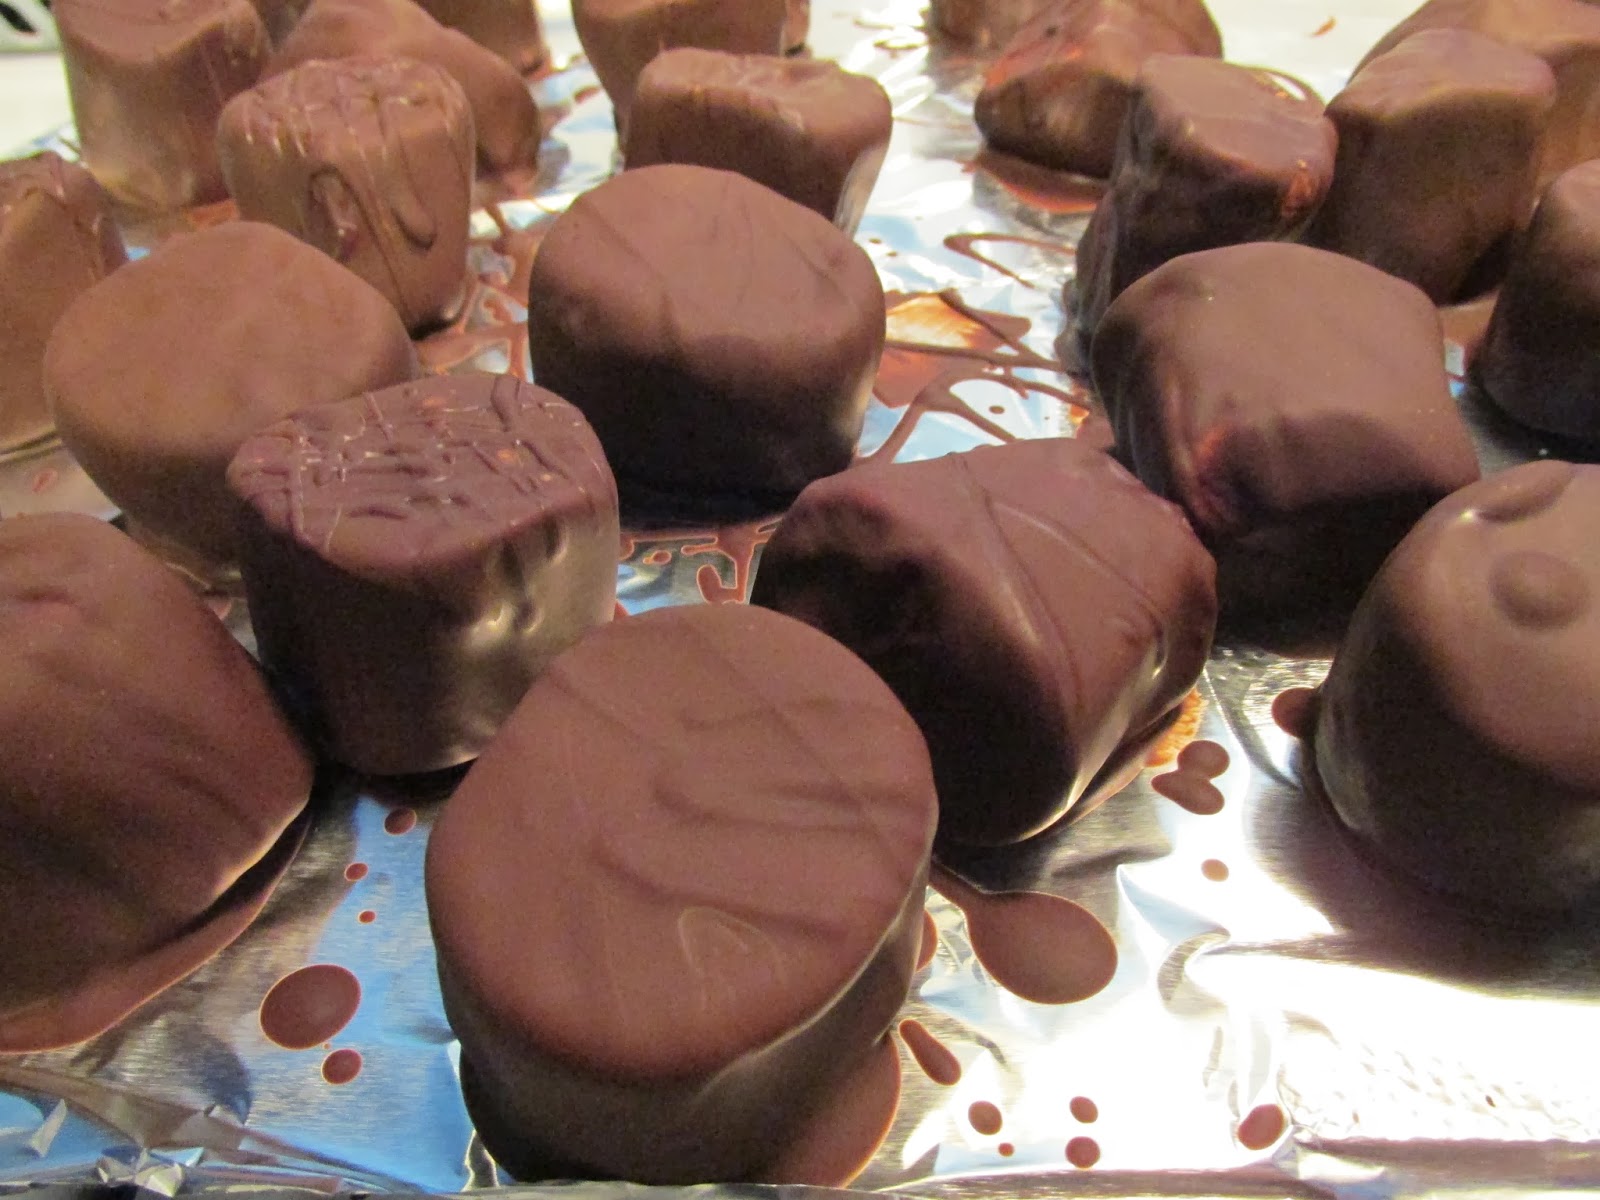
Today, I'd like to share a super easy DIY: What's better than bonbons? Well, that's easy chocolate covered bonbons!! I think it can be used for any occasion just by changing up a few things like colored ribbon or any decor you choose.

You will need:
1. Jar with lid/Mason Jar
2.Bonbons
3.Chocolate
4.Large & small pot (to melt the chocolate) details below
 FYI: Both of mine are glass but you can use a regular pot and glass bowl over it
  (whichever you use make sure it's heat resistant)
5.Foil or wax paper
6.Flat board,cookie sheet (to lay the bonbons to harden the chocolate)
7. Curling ribbon, decor

Directions:
1. In a large pot fill with water about 1/4 with water and place the smaller pot inside once the water has warmed up.
2.Place the chocolate inside the smaller pot,at this point you can turn off the fire, as the chocolate will melt with the bath water (don't put the chocolate in the water)
3.Stir until all of your chocolate has melted.
4.Dip your bonbons into the melted chocolate and coat completely using a fork to move them around and to take them out of the chocolate-
5. Hold the bonbon on the fork to let the excess chocolate run and place on your foiled/wax paper sheet (where it will be cooled)
6. Place in the refrigerator 15-20 min (even less) until the chocolate coating has become hard on the oputside
7. Place your chocolate covered bonbons in your jar
8.Decorate your jar (add curling ribbon, adornments, or even write a special message on the jar)

Choose your chocolate: white, dark,milk chocolate (here I have chocolate truffles/dark)

Choose your bonbons: White,colored, small,large (these are large) Keep in mind the smaller they are the longer you will last coating them with the chocolate

Find your jar: basically any jar with a lid, mason jar, heart shaped or other. Keep in mind your choice of decor-if you're adding color/paint on the outside, give it enough time to dry before handling the jar.

Warm up your water and put the chocolate inside the smaller pot (clear of the water). Stir until melted to soft consistency. Keep in mind that you don't want to boil the chocolate,only melt it.

Drop your bonbons 1-2 at a time and coat them completely with your fork. Hold on the fork to drip excess chocolate.


Set your covered chocolate bonbons to cool and harden on flat surface/cookie sheet,cutting board. As an option you can also drizzle the bonbons if you don't want to cover them completely or if you want to do a variation with less chocolate.


Place bonbons in the refrigerator 15-20 (or just until chocolate hardens)


Once  they have been cooled place your bonbons in your jar.


Add your ribbon, decor of your choice before you place your lid on.

And you are done!! I'm sure yours will turn out awesome!! Put your personal touch, whoever receives it will love it!!
This is a very cute idea!! It's delicious and the jar can be used to save other goodies when the bonbons are gone- and that will be fast!!! So, of course you can do this for Valentine's Day! If you don't like dark chocolate, use white chocolate, choose a heart shaped jar, choose a heart and hang it on with the curling ribbon of your choice, or if you're an artist paint your jar-why not? This can be as personal as you want to make it!! Good luck!!