Tuesday, March 25, 2014

Special Lemonade Recipe

Hello friends!
As we are all hoping, some wishing for warmer weather...I will leave you with this "Special Lemonade Recipe". The weather hasn't been all bad in Los Angeles-except for a couple cloudy days in between every now and then. However, I'm sure that sunny days are right around the corner! For those hot summertime days here's is something to cool you off!! Enjoy! :)

You will need:

4 Cups- Fresh Squeezed Lemon Juice 
(I will not mention how many lemons because they come in different sizes)
3 1/2 Cups- Water (or more)
2 Cups-Sugar
Ice-(As much or as little you prefer)


Choose yellow lemons that are nice and juicy!

Cut all your lemons in half. Check out these giant lemons!
They really were this big (bigger than the palm of my hand-the picture is not zoomed in).

Measure out 2 cups of sugar.

Here is where the actual work comes in....juice 4 cups of lemon juice; which will be divided in half.


In a pot pour in your sugar and 2 cups of the lemon juice (if you choose you can strain out the pulp and seeds left behind). 
I opted to pour in pulp and a couple seed that escaped,
simply note it can turn it a bit more tart-but it's lemonade, 

so it is meant to be!
Keep/save 2 cups of lemon juice to finish lemonade.

Fully integrate the lemon juice and sugar and start to heat up the mixture on a medium flame.

After 5-10 min you will see the lemon juice
 begin to bubble and you can turn off the heat.

At this point you will see your juice and sugar has turned into a syrup-like mixture and the color is much more vibrant. 
It's almost like creating a lemon concentrate that we 
will add to in order to fully develop it's potential.
This is what makes this lemonade special! Shhh! 

Don't give out the secret (just kidding).
 Let cool, you can place in the refrigerator to chill 15-20 min.

When you are ready to prepare your lemonade simply pour into your pitcher/container. We will combine the sugared-lemon syrup we created, 2 cups of lemon juice that you saved, 3 1/2 cups of water and ice. I like plenty of ice in my lemonade but that is a personal choice. If you feel that it is too tart or too sweet, 
simply add more water.  This will reduce the sweetness or extreme tartness.

What's left to do? Enjoy your lemonade in a shady spot. If you liked the recipe be sure to share with your friends, and let me know! Drop me a line, it would be good to get your opinions.


Thursday, March 20, 2014

Oatmeal & Raisin Cookie Recipe

Welcome Spring!! :)

Today I decided to try baking oatmeal and raisin cookies. Baking is not my forte, but I was feeling it today.
So these are pretty easy -at least I thought. This is the first time I make them; they are imperfect but perfectly delicious-golden around the edges and soft/chewy in the center. Give it a try, enjoy, and of course share any tips below!


Ingredients:
1- Cup Room Temp Butter
1-Cup Brown sugar
1/3-Cup white Sugar
2-Eggs
1-Tsp. Vanilla Extract
1 1/2- Cups Flour
1-Tsp. Baking Soda
1-Tsp. Salt
1/2-Tsp. Ground Cinnamon
3-Cups Rolled Oats
1- Cup Raisins


Mix butter until creamy, then add brown & white sugar. When completely mixed incorporate eggs and vanilla (one at a time). In a separate bowl combine dry ingredients and mix well (flour,baking soda,cinnamon,salt). Pour the dry ingredients into buttered sugar and combine them together. Make it all smooth before you pour in your oats and raisins. Grease you pan lightly, drop uniform shapes/circles separated evenly and bake 15-25 min at 350 degrees (depending on your oven). Check for crisp edges and soft centers. Allow a few minutes to cool, then place on cooling rack.


Of course, feel free to use other healthier options into the recipe or substitute any ingredients.
Enjoy! A great way to welcome the beautiful Spring.... cookies are a great way to welcome 
anything!!haha! ;)


Wednesday, March 12, 2014

Lasagna (without pasta) Using Mexican Squash/Calabacitas

Hello friends! Yesterday I decided to try out a new recipe, you know you may see something similar then put your twist on it. I didn't know if or how it would work, but I have to say for the first time making lasagna without the pasta it was good! You know there is nothing diet related about lasagna because it's cheese,pasta,meat, and more cheese on top. Well, I thought I might try doing a variation using Mexican Squash or calabacitas. I prepped my meat, sauce and condiments and instead of using pasta I used slices of the squash (length-wise). Of course no lasagna can be called a lasagna without delicious bubbly cheese, yumm!! So, this is not necessarily "healthy", but hey lets do it one step at  time! For now I only substituted the pasta and the rest of the ingredients were added as per usual in the creation of a delicious lasagna.

Ingredients:
1 lb. lean ground beef
1/4 onion roughly chopped
2 garlic cloves
1 tbsp oil (to add to your pan to cook meat)
garlic salt to taste
oregano
basil (4-6 leaves or as wanted)
4 med tomatoes chopped not too small
6 Mexican Squash-calabacitas (sliced length wise)
1 can tomato sauce
chili flakes (if desired)
1 lb mozzarella
1/4 lb cotija cheese

Start out by mincing your garlic, and cutting the onion so that they can be sauteed in a lightly oiled pan. After they have released their aroma and you gave them a couple minutes, proceed to add the ground beef meat and incorporate the onion and garlic into the meat.Keep your stove on medium to low heat to give the meat enough time to cook without burning. Add garlic salt over the meat,oregano, chili flakes as needed (I don't measure these things,you just have to eye it,taste,if you're not happy add more). As the meat has fully cooked pour over your chopped tomatoes and basil (about 4-6 leaves or more). Wait for the tomatoes to incorporate, release some of their flavor and add your canned tomato sauce.

In an oven-safe container add sauce to the bottom of your dish and begin assembly. Since the squash will be cut length wise you can comfortably form rows then begin to add your meat and sauce over the squash. Continue with a layer of the cheese mixture (mozzarella&cotija grated), and again add a layer of squash. Continue adding the layers until you are both finished with the meat/sauce and squash. Remember to leave enough cheese to be used as a delicious topping for your lasagna.


Put in the oven at 350¨ for 30-45 min depending on your oven. You can cover with foil for most of the cooking and uncover the last 10 min to get a golden-cheesy layer! Bon appetite!! Enjoy it, food is meant to be enjoyed-we may not eat this very often because it's so rich but when we do, we must enjoy!!


Wednesday, March 5, 2014

Fish Soup (Caldo de pescado) Recipe

Hello friends! Today I made fish soup/broth for lunch and being that cooking is also one of the things that I find so much enjoyment and passion over I wanted to share. I might periodically try to post up some other recipes as time goes on. If you try it, you might be pleasantly surprised and like it or you can tweak it to what ever you like best! See ya!! ;)


Catfish whole (ask your butcher to cut for you)
6 carrots
4 large potatoes
2 celery stalks
4 tomatoes
1 onion
3 garlic cloves
1 chile pasilla
cilantro bunch
lemon (optional)
salt
Knorr chicken bouillon
oil (I used vegetable oil)
pan
stew pot

In pot start to boil water about halfway full with onion and garlic clove and salt.
Cut up your potatoes, carrots, and celery and drop into the pot that you have started with the boiling water.
In a pan heat up some oil, open up your chile pasilla,clean it, and fry/toast in the oil (without burning it). Cut up your onion, tomato, garlic (roughly cut) and cook in the extra oiled pan until tender. In your blender take the chile pasilla with a little bit of the water from the vegetables and blend until smooth. Use a sifter to add your chile pasilla to the broth/soup.Once the tomato and onion mixture has softened in your pot blend it all smooth and pour in your pot as well. To the pot add roughly cut cilantro and chicken bouillon-taste for salt preference. At this point all your vegetables should be soft, and your catfish entirely cleaned out so that it can be added to the soup. Cook the fish until tender and once the soup has attained the desired consistency. Best served hot,optional with a drizzle or lemon.

*keep your flame/fire at a med level because you don't want all your vegetable to break down.
*When you add the fish bring flame/fire to lowest temp for a slow simmer so that your fish does not fall apart.

Enjoy!! Hope you like it...It's not too fishy-not too spicy,just right!! Leave me comments below :) !!!


Friday, February 21, 2014

1 Year Anniversary!!- B3beautybyblanca/ YouTube

Hello Friends!
I'm super excited to share that it has now been one year since I started my channel B3beautybyblanca on YouTube! It's pretty awesome because it was something that I wanted to do, but wasn't sure I'd be good at-because I'm not a pro. I just happened to become pretty much addicted to beauty videos on YouTube; with plenty of time on my hands thought it might be something that I could try to do.

When I started my channel I wasn't expecting to become any YouTube star, which I haven't become- and that's o.k. I asked my friends on Facebook to come over and watch me, which probably sounded pretty annoying. But I'm really grateful to those that did and continue to take the time to watch a video or read my blog. It's really meaningful to get that support and it makes a big difference.

I should explain that I didn't start my channel because I'm egocentric or even think that I'm so beautiful that I can't get over myself....that's far from it! I have always felt normal,regular, I guess?! I do however believe that doing what you like and really enjoy makes you feel good and gives you a particular satisfaction. So, even though I'm not a professional make up artist, I don't have the funds to try the millions of beauty products that I would love to try and be able to tell you how awesome they are-I really enjoy doing this!!

I started the channel in the hopes of having something positive, to keep my mind entertained and distracted from problems/life. Not that I would be escaping reality, but rather bringing some beauty to it-did you catch that ;) ? This seemed like a new adventure when everything seemed to be going wrong. I needed pretty much desperately to feel that I could create, be productive, and learn. I don't know if my make-up techniques are all that great, but I think I've developed them a bit (or I'd like to think so! you can be the judge of that! haha!). When I started doing the videos I had no idea how to edit them,NO CLUE! I won't say that I'm a miracle worker now, but I'm content with the fact that I have learned so much about how to make a video/tutorial. And it's not as easy as it seems when you see it.

When we look at a video/tutorial within the first few seconds have enough time to decipher whether it should be allowed our view or not. Meanwhile, on the other side of the screen preparing, creating, revising the project takes so much time even for a video that will only be a few minutes long.

Well, even at my inexperienced level it has taken a lot of time which I have enjoyed for the most part. I guess the joy doesn't come in knowing that thousands of people will watch the video, rather in the fact that you put the work into it and completed it! I would have loved to have done more with my channel in the past year but because of health reasons I did not feel balanced enough to continuously produce more work (because it is work even if the only thing you earn from it is self satisfaction).

O.k. so this has been stretched a bit long...I have to say THANK YOU again for being supportive!!

-P.S. official date 2/17/13-first video published on YouTube
(I had other issues to attend to this week and had not been able to post this! ahhh!)
-Oh! I saw a beautiful humming bird today in my back yard near the basil plant I like to believe they're good luck and anytime I see one I will make a wish! Hope it works!


Thursday, February 6, 2014

DIY: Chocolate Covered Bonbons


Hello Friends!

Today, I'd like to share a super easy DIY: What's better than bonbons? Well, that's easy chocolate covered bonbons!! I think it can be used for any occasion just by changing up a few things like colored ribbon or any decor you choose.

You will need:
1. Jar with lid/Mason Jar
2.Bonbons
3.Chocolate
4.Large & small pot (to melt the chocolate) details below
 FYI: Both of mine are glass but you can use a regular pot and glass bowl over it
  (whichever you use make sure it's heat resistant)
5.Foil or wax paper
6.Flat board,cookie sheet (to lay the bonbons to harden the chocolate)
7. Curling ribbon, decor

Directions:
1. In a large pot fill with water about 1/4 with water and place the smaller pot inside once the water has warmed up.
2.Place the chocolate inside the smaller pot,at this point you can turn off the fire, as the chocolate will melt with the bath water (don't put the chocolate in the water)
3.Stir until all of your chocolate has melted.
4.Dip your bonbons into the melted chocolate and coat completely using a fork to move them around and to take them out of the chocolate-
5. Hold the bonbon on the fork to let the excess chocolate run and place on your foiled/wax paper sheet (where it will be cooled)
6. Place in the refrigerator 15-20 min (even less) until the chocolate coating has become hard on the oputside
7. Place your chocolate covered bonbons in your jar
8.Decorate your jar (add curling ribbon, adornments, or even write a special message on the jar)

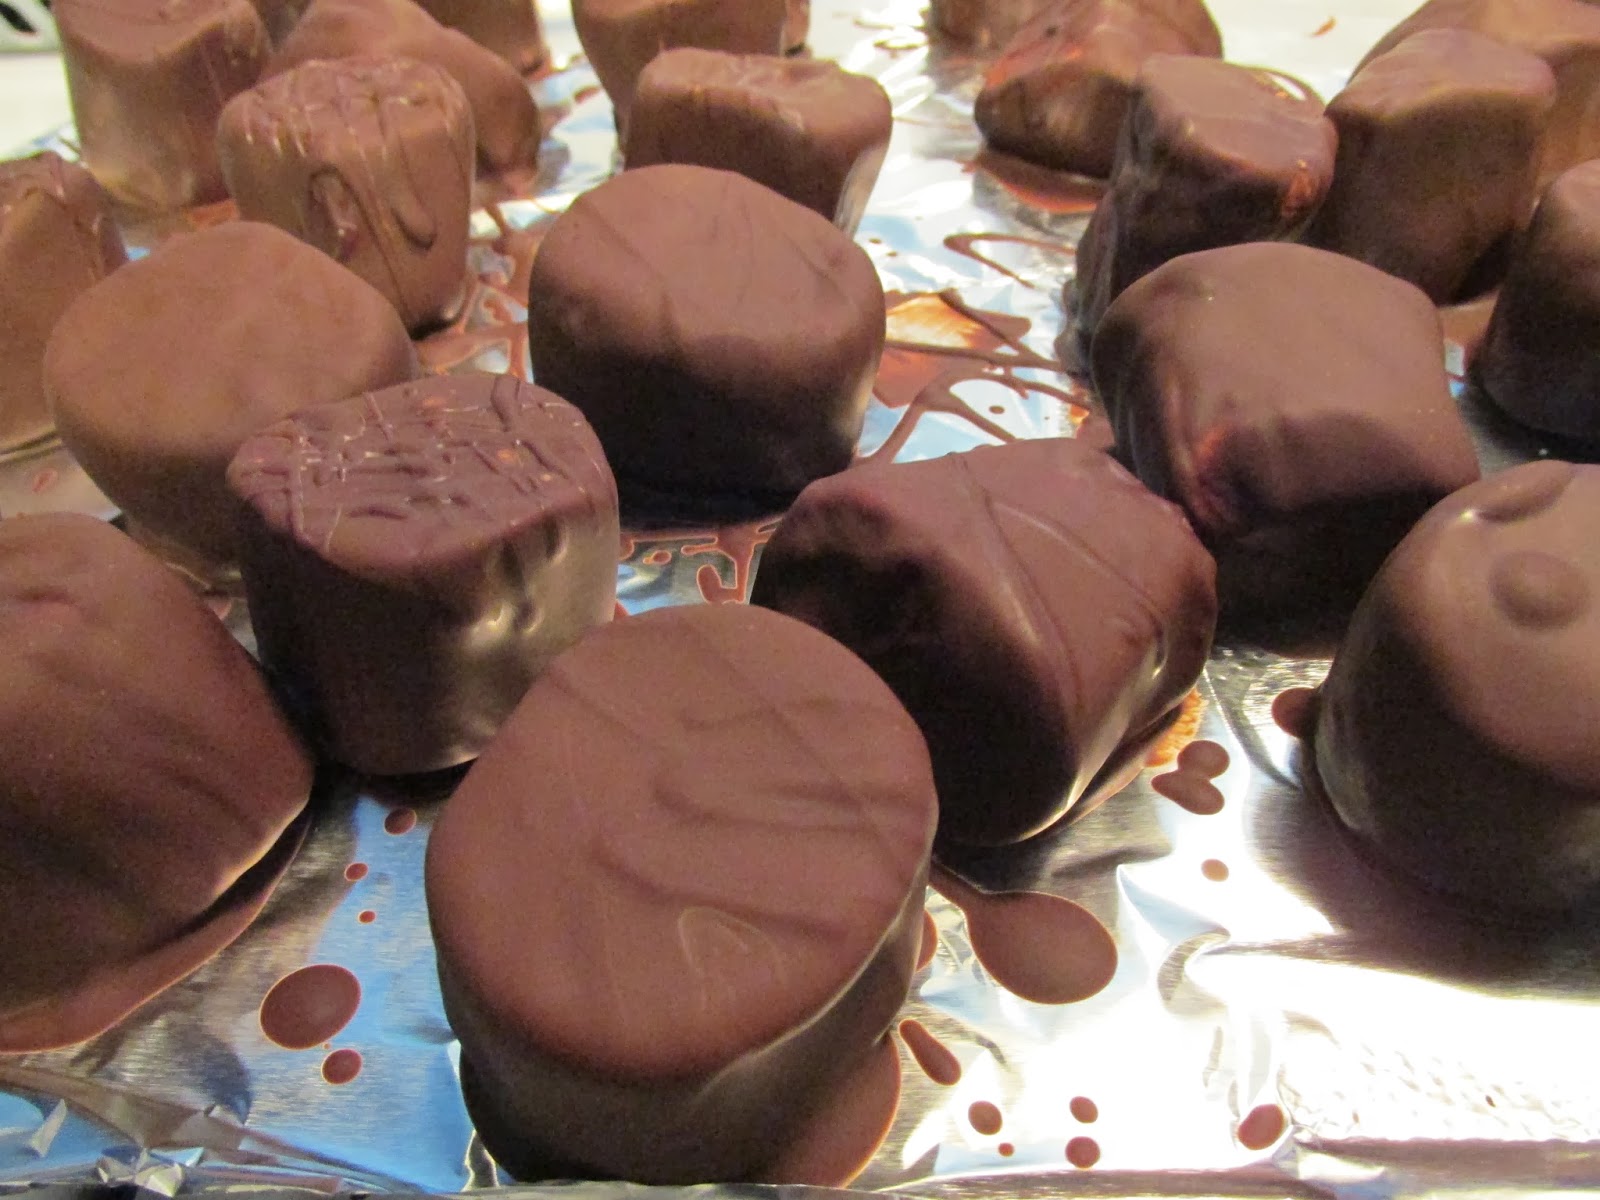
Choose your chocolate: white, dark,milk chocolate (here I have chocolate truffles/dark)

Choose your bonbons: White,colored, small,large (these are large) Keep in mind the smaller they are the longer you will last coating them with the chocolate

Find your jar: basically any jar with a lid, mason jar, heart shaped or other. Keep in mind your choice of decor-if you're adding color/paint on the outside, give it enough time to dry before handling the jar.

Warm up your water and put the chocolate inside the smaller pot (clear of the water). Stir until melted to soft consistency. Keep in mind that you don't want to boil the chocolate,only melt it.

Drop your bonbons 1-2 at a time and coat them completely with your fork. Hold on the fork to drip excess chocolate.


Set your covered chocolate bonbons to cool and harden on flat surface/cookie sheet,cutting board. As an option you can also drizzle the bonbons if you don't want to cover them completely or if you want to do a variation with less chocolate.


Place bonbons in the refrigerator 15-20 (or just until chocolate hardens)


Once  they have been cooled place your bonbons in your jar.


Add your ribbon, decor of your choice before you place your lid on.

And you are done!! I'm sure yours will turn out awesome!! Put your personal touch, whoever receives it will love it!!
This is a very cute idea!! It's delicious and the jar can be used to save other goodies when the bonbons are gone- and that will be fast!!! So, of course you can do this for Valentine's Day! If you don't like dark chocolate, use white chocolate, choose a heart shaped jar, choose a heart and hang it on with the curling ribbon of your choice, or if you're an artist paint your jar-why not? This can be as personal as you want to make it!! Good luck!!

Monday, January 27, 2014

Dyeing My Blonde Extensions Brown "Test Strip"

Hello Friends!

Today I spent the day dyeing my truly overgrown roots at home. I have done it many times, mostly successfully and a few times quite disastrous. Because I knew that I would have some hair dye left over I decided to do a dye test on my clip in extensions, which are blonde. I bought them this color because the color that I wanted was not available in the length and you know how that goes: A woman wants what a woman wants! O.k. just a little joke but you get my point if you're buying something you want exactly what you desire and no less. So, these extensions can be dyed, curled, washed, treated like real hair. But also the picture on the website was darker than what I actually received and I said well I'll still be able to dye it so I will work with it. I've had them for probably a year and really haven't worn them because of the extreme contrast in color..now much less because I chopped my hair much shorter about four months ago. Well, let's get on to this...I had never even washed the extensions because I had only tried them on. I added my extra hair dye to the smallest clip in extension just to test how the color would take to the blonde extension.

These are the extensions-blonde. I have not yet dyed them all only the smallest test strip
The color that I used to dye both my natural hair and the blonde extension was a light brown. I was aware that the strip would take the color a lot faster than natural hair because they have been processed and blonde catches a darker color quite easily.

I won't lie and say that I timed the process but I left the dye only for about ten minutes because I could see the color absorbing quite quickly. They looked quite dark, and I proceeded to wash them and condition them just as if I were washing my hair.

Now, the top clip in extension appeared much darker as it was freshly washed 
and sat next to the the blonde extension.

I combed the extension and set it to dry flat on a towel. When it was finally dry I could see that a lot of the blonde was still peeking through. The hair although visibly darker in this picture, looks more like an ash blonde... the color looks beautiful but still does not match my hair color. I don't plan on cutting the extensions too much if at all; I rather wait to grow out my hair a bit because it would defeat the purpose of buying longer extensions if I get rid of the length. So, I still have time to process how I want to proceed with this.

I know that through doing this test strip I would have to wash the extensions to try to strip some of the extra products that the extension manufacturer added and that way the dye would grip better. Also, I might leave it in for a bit longer when I decide to do all the extensions. Or, as I have already seen how much of the dye changes the hair in ten minutes I could do all for ten minutes to get them evenly toned-then if I'm still not content I can go back for maybe another 5-10 minutes.

I'm not a hair dresser and these are the first extensions that I dye, so it was quite experimental. I'm sure that it will be better to add a little of product at a time and perhaps get a lighter tone than desired because taking out a darker color might just be a bigger headache. I will plan to record the video of when I actually dye them all to be able to show you results and maybe be able to give you a few tips.

Remember to subscribe to my channel on YouTube and this one too..Thank you!!